Installing A CB RadioWe had ordered our first LD with a CB radio installed. When we bought our used RB last year, a CB was about the only thing missing that I would have liked to have. So after a year I decided to install one. I decided to go with a Cobra 75 WX ST, a hand-held radio. For an antenna I selected a Firestick non-ground plane model |
 |
Here's the final result. The radio is convenient to see and use when driving. |
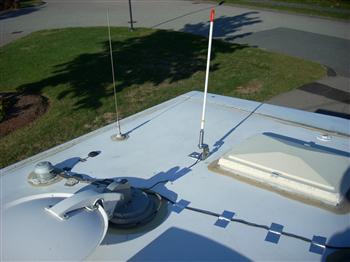 |
Let's start with the hard part: mounting the antenna and getting the cable inside (the REALLY hard part). The white antenna with the red cap is the FirestikFG2-648-W Non-Ground Plane CB antenna. Last year, while mounting something else on the roof, I had amazingly had the forethought to mount a heavy aluminum bracket for the CB antenna. |
 |
I used half of the Firestik's universal mount with matching holes drilled through the roof bracket. I also included a small clamp to prevent stress on the cable connection at the base of the antenna. |
|
|
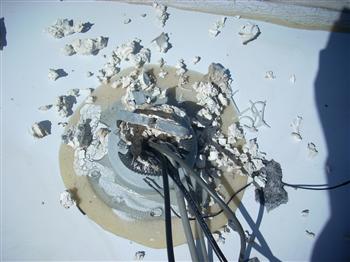
The biggest challenge of this project was getting the antenna cable from the roof to inside. Our rig came a factory-installed manual satellite dish, and as a result LD had also included a vent stack for cable entry. The problem was that the vent was packed full of that famous LD sealant. This is what I faced after removing the vent cap. |
 |
Here's the progress after about an hour. I used pliers to rip out small pieces, bit by bit. In the other hand I wielded a utility knive.....very carefully so as not to cut into the satellite dish cables. |
 |
I finally dug my way down to roof level and was very happy to find the hole as large as I had hoped. While installing the CB antenna, I also wanted to route my wi-fi and cell phone antenna cables through the vent. There was just enough room for the USB connector on the end of the wi-fi cable to fit through the hole. That went in first, followed by the cell phone and CB cables. |
|
|
I gathered the cables together and wrapped a good amount of electrical tape around them. Time to reseal the opening with some polyurethan sealant. |
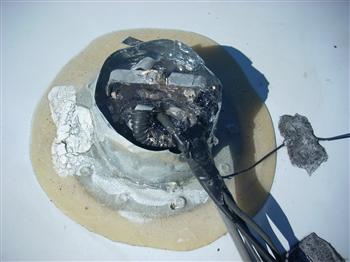 |
While I was at it, I made a higher sleeve to fit around the stack, using some aluminum flashing. It fits tightly up under the vent cover and I put some of the sealant around the bottom. |
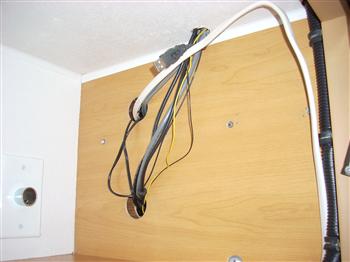 |
This shows where the cables come through the roof into the interior. The hole is right at the forward end of the driver's-side overhead compartment. Behind the other side of the wall are shelves for satellite receiver, DVD, etc, , and the hidden area where I have tucked most of my electrical components. |
|
|
I made a new false end to the compartment to hide all the wires. It's merely a press-fit and the hole at the top serves two purposes: It provides access to the end of the USB cable from the wi-fi antenna and it serves as a finger-hold when it's necessary to remove the panel. Minwax Golden Pecan stain is a very good match to the original LD wood color. |
 |
The power source (the white box in the center) for the hand-held unit is mounted under dash just to the right of the steering column. This view is looking up from the brake pedal. I first wired the CB into the dash radio circuit and grounded it to the dash - this resulted in a lot of ignition noise on the CB. I rewired it, both positive and ground, into a dedicated coach battery circuit shared by nothing else, which solved the problem. |
 |
There's a short lead from the power box for the hand-held unit to plug into. |
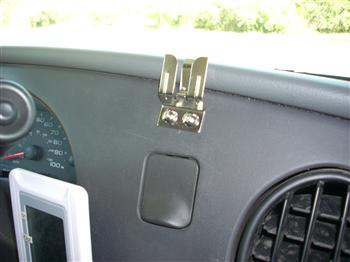 |
I mounted the clip to hold the CB on the dash above the 12V accessory jack, which we never use. Before drilling the mounting holes for the screws I felt around behind the dash in that area and was satisfied that I wouldn't be drilling into something. One final task to get the radio to perform properly was to tune the antenna using an SW meter. |


