How to Re-String an RV Window Night ShadeWindow shades seem to the bane of all RV'ers - eventually a cord in one will fray or break, leaving you unable to properly operate the shade. I decided that it was time to learn how to do this repair myself. After some time on the internet, I was not able to come up with the proper diagram for our 4-string night-only shade. Evidently most RV'ers have day-night shades, which are a little different. Anyway, I did find enough information to convince me that I could tackle this with some chance of success. During the process I prepared a correct diagram which is included below. Before you can begin, you need to find replacement cord. I got mine at a "The Blind Shop" store in Florida. It's a 1.2 mm cord and I got about 150' of it; hopefully that will last the lifetime of our Lazy Daze. Others have found a suitable cord at Wal-Mart, Michael's or Joanne's Fabrics. You can also order it on the internet. I've also read that some have used nylon fishing line. How much cord do you need? To estimate that, measure the height and width of the window. Each cord will require the sum of the height and twice the width plus about 6 inches (the two cords closer to the center will be a little less, but at least you'll have enough). |
|
|
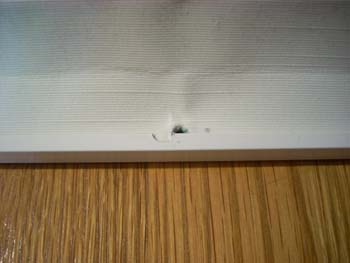
The first order of business is to remove the shade. The shade is mounted on the top of the window frame up behind the valance. Although the shade can be removed without removing the valance, you can gain some working room by removing the screws that hold the bottom of the side valances in place. The screw heads are hidden under cloth-covered buttons (one on each side) that you can easily pop off with a screwdriver. |
|
|
With the screw removed from the wall you can pull the bottom of the valance out enough to ease access to the shade mounting screws up above. |
|
|
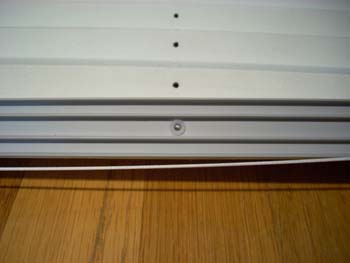
Next unscrew the plastic cord spools located just below the bottom of the side valance, one on each side of the window. There is a small plastic spacer tube between the spool and the wall - be careful not to lose it. |
| This space intentionally left blank. | Before removing the shade mounting screws, mark with a pencil on the window frame beside the top shade rail the location of the middle screw hole - this will make it a little easier to remount the shade when repairs are complete. |
|
|
Remove the two end screws first. With an assistant holding the shade top rail in place, remove the third screw. You can carefully lower the shade down and toward you by holding the bottom of the side valances out a bit from the wall. If you're removing more than one shade at a time, use a marker to note on the top rail the window it goes in. The screw hole positions are NOT identical on each shade, so if you try to remount a shade in a different window than it came from, you won't find the screw holes in the frame. |
|
|
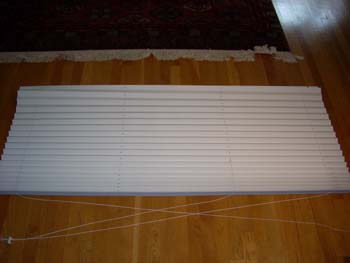
Phase two of this project is to take the shade apart so you can replace the broken or frayed string(s). Lay the shade down a large flat surface - probably the floor, or perhaps you have a large table or counter available. |
|
|
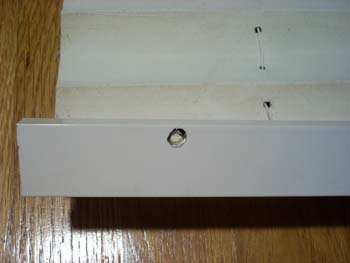
Remove the plastic end caps of the top and bottom rails. A small screwdriver can be used to pry them off. Do not pull them off the strings. |
|
|
Slide the bottom of the bottom rail to one side or the other, all the way off. Here I have begun to slide the bottom to the left. |
|
|
Next you need to remove the top rail. This is not quite as easy as the bottom rail. You will find a brass grommet pressed into each of the screw mounting holes. They go through the outer rail and into the inner rail and will need to be removed before the outer rail will slide off. |
|
|
This is the top surface of the top rail - you can see that the grommet does not come all the way through. |
|
|
Using a small screwdriver, gently pry the grommet out of the hole. Here it is about halfway out. |
|
|
Now you can begin to slide the top rail off. But you have to careful - there's a sharp edge around the grommet cut-out that can catch on the shade material and rip it. |
|
|
Use a small screwdriver or other flat object to press down on the material as you slowly slide the rail past. Since it takes two hands to slide the top rail, an assistant is a big help here to provide the needed third hand. |
|
|
With the top rail removed, the two springs that provide tension to hold the shade in position are exposed. Two cords fasten to each spring. This picture shows what caused my shades to fail - one cord on each side had broken where it goes through a plastic grommet in the top rail. |
|
|
Close-up of the two springs. |
|
|
This shows how the cords are fastened to the springs with small squeeze clamps. These little clamps are available as part of re-stringing kits. I chose to simply tie the strings to the spring. |
|
|
There are four cords in each shade. Two go to the left inside the top rail, down through the holes in the pleats and then over the right inside the bottom rail. The other two cords do the opposite. There are two tension springs at the top - one going to the left, the other to the right. Both cords from one side fasten to a spring. |
| This space intentionally left blank. | Using the old cord (if you still have it) as a template, cut a new cord, adding a little extra for a safety margin - you can cut it later. Cut off the broken cord from the spring and fasten the new cord to the spring. If you can get the squeeze clamps, fine; otherwise securely tie the cord to the spring. |
|
|
Inspect the plastic grommets in the top rail through which the cord passes to make sure it is not broken or missing. |


|
When we had to restring our third shade recently, we found that somehow one of the plastic grommets had disappeared. Without the smooth edge of the grommet, the cord had eaten its way through about half an inch of the plastic bottom rail.What is amazing is that this was not the cord that broke - it was not even frayed in the least.
My cohort came up with a piece of tubing from a Soft Soap dispenser. I cut off a piece about 3/8" long, smoothed the edge and press-fit it into the hole in the rail. We'll see how long it lasts.
|

|
|
Pass the free end of the cord you just fastened to the spring down through the plastic grommet toward the side where the pleats begin. |
|
|
Thread the cord through the eye of a very large needle, which you can then use to guide the cord through the holes in the pleats. You can gather 2-3 pleats at a time to speed up the process a bit. If you don't have a large needle, you could use a thin, stiff wire with a loop bent into one end to hold the cord. |
|
|
At the bottom, thread the cord through the plastic grommet in the bottom rail and then guide the cord over to the opposite side of the bottom rail. Pass the cord through the hole in the plastic end cap; then pass the cord through one of the two holes in the plastic spool (the other hole will either have a unbroken cord through it, or you will be putting a replaced second cord through it). Note the direction in which the cords pass through the holes. Then tie the two cords together near their ends. |
| This space intentionally left blank. |
Slide the top rails back together. As when removing it, be very careful while sliding it on to ensure the edges of the grommet cut-out do not catch on the shade material Be sure the springs and cords are laying the large middle groove as you slide the rail on. It helps to have an assistant pull on the cords at the bottom to keep them taut in the middle groove as you slide the rail on. Replace the grommets, but be careful you don't lose them before getting the shade rehung - once removed, they seem to be a little looser when you put them back. Replace the plastic end caps. Slide the bottom rail back into place, again having an assistant hold the cords taut in the center groove. Replace the plastic end caps. |
|
|
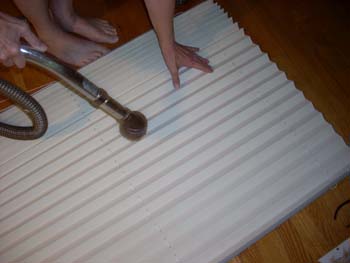
While you have the shade out of the RV, it's a excellent time to give it a good cleaning. |
|
|
Unless you're re-mounting the shade immediately, I recommend that you pull the shade into its "up" position and use a twist-em, string, or rubber band to hold it securely closed. I had some of those large twist-ems that come with new RV water hoses, which worked great. This will help maintain the "pleatiness" of the shade until you get it mounted. Once again, an able-bodied assistant is a big help in getting the shade "up" while keeping the pleats in line. |
| This space intentionally left blank. | All that remains now is to re-mount the shade in the window frame. Have your assistant hold the shade up against the top of the window frame while you screw it back in place. Hopefully before removing the shade you marked the relative location of at least the middle screw hole so you don't have too much trouble finding the screw hole in the frame. |
|
|
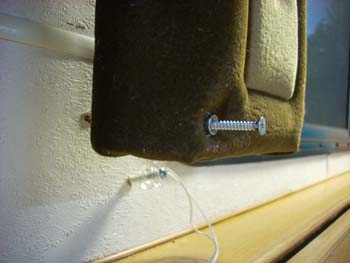
Almost done - all that remains is screw the plastic cord spool back to the wall and adjust the tension so that the shade will stay in any position. This is a little tricky and involves some trial and error, especially on your first shade. You need to pull the cords out from the bottom rail on one side a bit while your assistant does the same on the other. Raise the shade a few inches - this will give you a little more slack in the cords. Push the plastic spool up against the rail and then hold the cords straight down. Put your thumbnail on the cord about an inch above where the spool screw hole in the wall is located. Have your assistant tie a knot in the cords where your thumb nail is. Pull the spool down to the knot and re-fasten to the wall. Don't forget the little spacer between the spool and the wall. Repeat on the other side. Try putting the shade up and see if it stays wherever you put it and also check to see if the bottom rail is horizontal. If the bottom of the shade is not horizontal, then you do not have equal tension on both sides of the shade; adjust one side or the other by moving the knot at the spool up or down. You want the tension just enough to hold the shade in position: too little will result in the shade lowering; too much will cause excessive wear on the cords......meaning that you'll be doing this again sooner than you'd like. <VBG> |
| There ya go! See, it wasn't that bad, was it? It took me and my assistant about two and a half hours to do the first shade, and only about 20 minutes to do the second one. |