
The Toad Hollow & Mud Pond Rlwy
Building a Power Plant
The Early Years What's Left The Glory Years
(Click the above links to follow the history of the TH&MP)
Quite a few years ago, while at a model railroad show, I picked up a Korber Models General Light and Power kit for a coal-fired power generating plant, thinking it might be useful sometime. That sometime came after the TH&MP was moved back to New England and was dramatically reduced in size. One end of the layout cried out for something to take attention away from a big expanse of wall. I have also picked up a Walthers sub-station and a couple of high-tension power-line towers, so I should be able to really fill in that space. I'm also thinking of adding a siding off the second track from the front to allow hoppers to deliver coal to the plant.
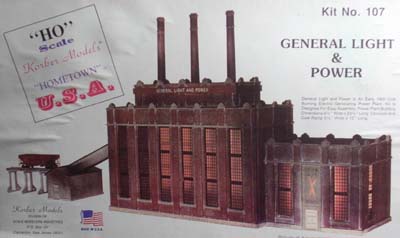
This is the picture on the kit box cover.
Aha, that Korber kit should be perfect for this.
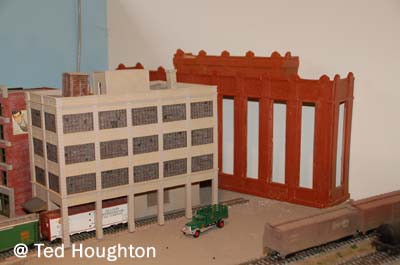
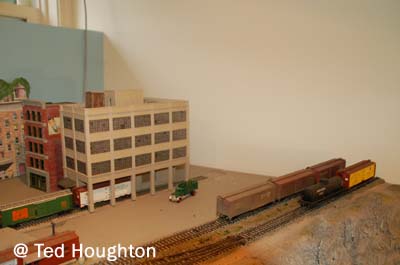
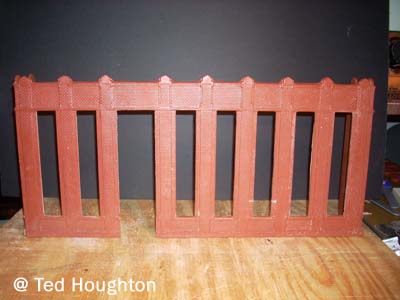
It isn't very far from that tan building to the wall, so I decided this would be a great kit-bashing project to make it fit. About four years ago, I took a stab at it and got this far. Not needing the rear wall of the building, I was able to use some of it on the front to make the building longer. I also cut the end walls in half so that the building is now only 3 1/2" deep.
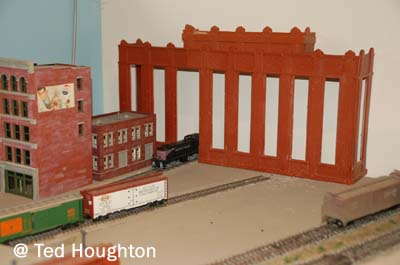
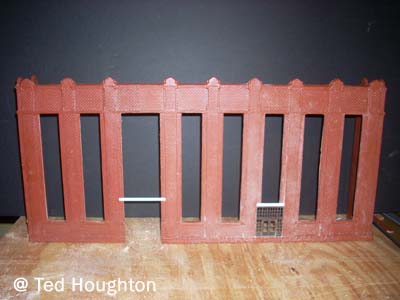
With that tan building removed, you can see another challenge I faced: that track where the locomotive is is the stub end of a switchback to a lower level and operationally I can't afford to give up an inch of it. So where I spliced some of the rear wall to the front, I widened the opening a bit so that a loco or freight car can fit through. I'll have to dream up some reason for it - maybe the electric company requested the arrangement so that generators and boilers could easily be delivered by rail.
6 Sep 2016: All right, time to get back to work on this thing.
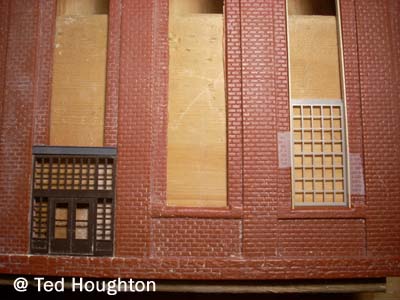
11 Sep 16: I was looking at this the other day and it dawned on me that there was no doorway to the building. I suppose I could have explained that away by saying that this was the back of the building or something, but that would have been the easy way out. I rummaged through my boxes of left-over "stuff" from other kit-bashes and came up with a nice double-door that should do just fine. Some steps and a canopy will help also. I was quite lucky in that the door I found just fit in the width of one of those tall windows. All I had to do was cut away some of the wall down to the foundation. The two white pieces are I-beams that will hold the weight of the walls/windows above.
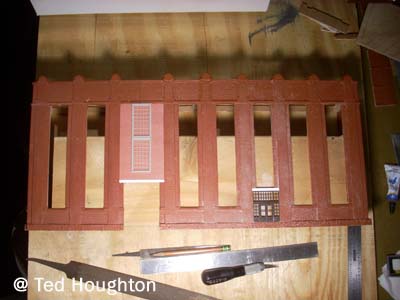
Despite all my scrap pieces of "stuff", I could not find any suitable brick material to use. We have a small hobby shop in town and to my amazement, they had some brick sheets that were just about a perfect match size-wise for the Korber bricks. Color-wise the match is not quite as good, so I'll be doing some painting and weathering. Here the new brick section is lying in place above the railroad track doorway. I'll probably put a couple of windows in that new section that match the rest of the windows. I have a lot of windows to paint!
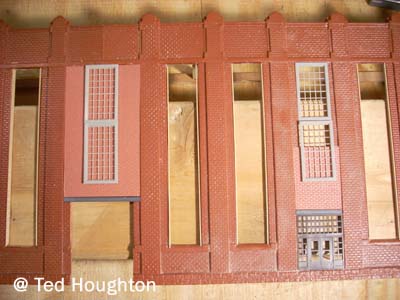
20 Sep 16: Can't say I'm impressed with Korber's quality control. The windows they provide are much smaller than the openings in the wall, requiring shims on each side of the opening. Luckily I had some small pieces of bass stripwood that I cut to fit. Here I taped the shims in place so I could check the fit. Now I need to paint all the shims along with the windows, but I can't decide on whether they should be the same color or different.
A couple of days ago I got the I-beams over the door and the track opening painted. Still need to paint the doorway.
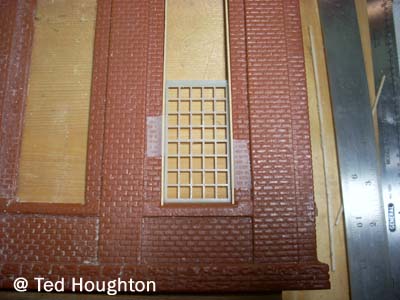
I also cut a piece of brick siding to fit over the doorway. I need to cut the excess off the top so that it just fits between the I-beam and the lower window.
10 Oct 16: Yes, I know, progress is slow, but hey, the tortoise won the race, didn't he? A few days ago I added some wood bracing to stiffen support for that new brick and window panel above the wide opening.

Today I glued in both new brick panels and painted the entry door. No. it is not glued in place yet. I'm still deciding what shade of brick to paint this thing - definitely needs to be more brick reddish., and of course it will take a lot of weathering to make it look like an old coal-fired plant. I also painted the shims I had to make for the too-wide window openings. Next is to paint 28 windows! Ugh.

11 Oct 16: The painted shims for the sides of the window openings, along with the pile of windows that I need to paint.

12 Oct 16: Got the windows painted.

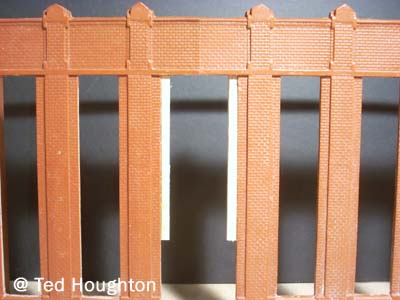
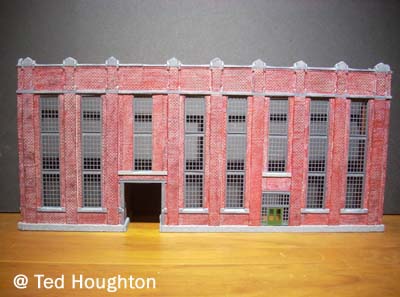
14 Oct 16: I spray-painted the building using a small can of Tamiya spray paint, Mica Red. It came out quite a bit more glossy than I expected but since I'll be weathering it a lot, that shouldn't be a problem. The upper right portion is how it looked after the spray painting, and the rest shows the beginning of the weathering effort. The first step was to use a light-colored wash that flowed into the mortar lines and could be lightly wiped off the brick face.

You can see the difference in the colors here: the bottom part is with the Mica Red spray paint showing on the parapet, while the parapet of the smaller upper section are the original color of the kit.

15 Oct 16: Today I got the cement parts of the building painted gray.
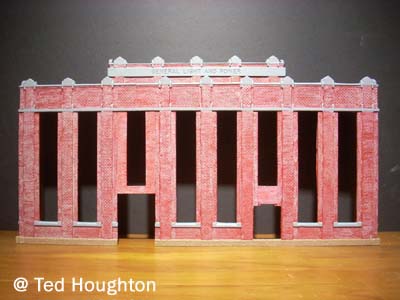
26 Oct 16: A little more progress. The stone work on the upper module has been painted, as has the stone foundation.
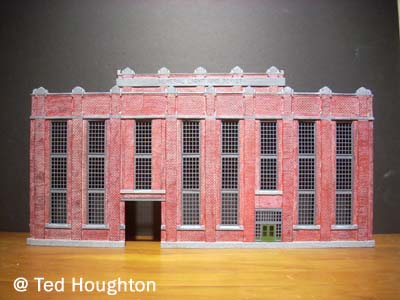
12 Nov 16: Now we're talking. At last it's beginning to look like something that might work. I didn't like the brown foundation stones so I repainted them gray. I'll darken them up a bit. I'm happy to have the blasted windows installed. I wonder if other builders of this kit were as frustrated as I was at the terrible fit of the windows into the wall openings. As noted above I had to add shims on each side of the windows and another across the top of the opening. Yet to come: some glazing over the windows on the inside.
14 May 17: Things slowed down a bit over the winter - it got a bit chilly in the cellar. But I did get a tad more done in regard to that opening where the track goes into the building. There are now walls on the inside of that area, and I added some steel L-bar material to the sides of the opening to protect the brickwork.
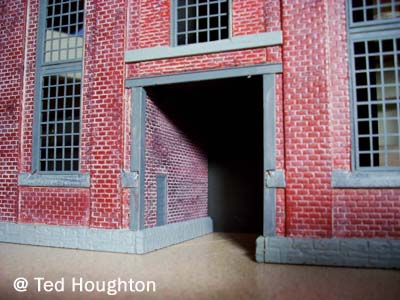
14 May 17: On the left wall for visual effect I added a doorway.
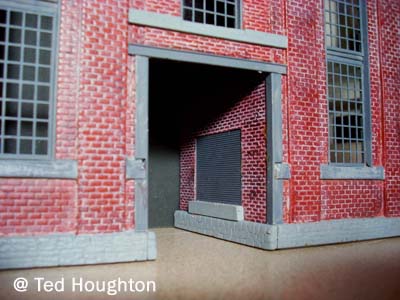
14 May 17: And in the right side there is larger freight-sized door where equipment for the plant can be off-loaded.